Introduction
This tutorial describes an easy way for making videos in VMD capturing the screen with Kazam on Linux, QuickTime Player on mac or Xbox Game Bar on windows.
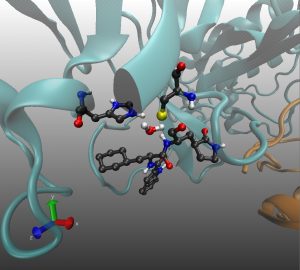
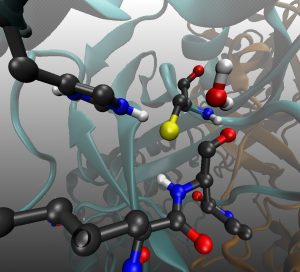
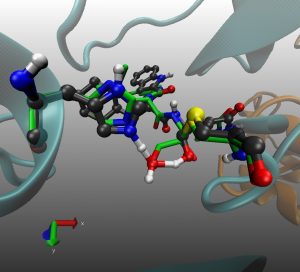
As you have seen, I created a smooth transition between different points of view of the system. I then played the animation of the reaction mechanism until the formation of the Transition State (TS) structure, where another green molecule appears. After that, there’s a transition between different points of view until returning to the point where this transition began. Once there, the green molecule disappears, and the reaction continues. When the reaction finishes, a final transition is played to return to the initial point of view.
To make this video I used the view_change_render.tcl script to create the transitions between selected points of view.
In order to replicate this video I am sharing the files I used:
- Amber Parameters: 11a.prmtop
- Trajectory: trajectory.rar(rst files) or netcd file (netcdf files can’t be used in Windows).
- Aligned PDB: (6XHM.pdb) for the system with the green coloured inhibitor.
- VMD visualisation file: (visual_11a_scan.vmd)
- TCL script to create the animation: movie.tcl
Tutorial
Loading Files
If you have your own files you can skip this part.
- Open VMD from the file-containing folder using the command line in the bash console. If you are using Windows, once in VMD, go to Extensions -> Tk Console and type the path where you downloaded the files (something like cd D:/Users/Carlos/Downloads/ ¯\_(ツ)_/¯ )
For Windows and M1 chip Mac users, the netcdf file will not work. Decompress the trajectory.rar file so that every *.rst file is in the same folder as visual_11a_scan.vmd.
- Load the files using the visual_11a_scan.vmd file. (File -> Load Visualisation state .. visual_11a_scan.vmd)
- This is not necessary for creating transitions, points of view, or even the video. This file simply loads the structures into VMD and then displays the atom selection as shown in the video.
- For Linux or Intel Mac users, I recommend using the netcdf file (though you can use the rst files if you prefer). Load it in the VMD main console. Right-click on the molecule with ID=0 (11aIP.prmtop), then select “Load data into molecule”, browse and load the reaction_11a_3clpro.nc.
Creating Visualisation Points of View
First in the Tk console load the view_change_render.tcl by typing:
source view_change_render.tcl
Save the viewpoints between which you want to create transitions using the command: save_vp 1, save_vp 2, save_vp 3, save_vp 4, save_vp 5, and so on.
This is entirely up to you. These are the viewpoints I selected for making this video.
-
save_vp 1
-
save_vp 2
-
save_vp 3
Once the viewpoints are created/saved, it’s time to create the entire animation. In the Tk console, type:
source movie.tcl.
This command will run the script that animates the transitions and plays the reaction.
Now That everything is ready, we can save this animation as an mp4 file.
Saving the Animation as mp4
-
Linux
For me, the most convenient way to do this is using Kazam. It can be downloaded from the software store, at least in Ubuntu.
-
- Open Kazam.
- Select screen cast and the recording method. The “Area” option works best for me.
- Press capture.
- Source the the movie.tcl file in the TK console of VMD when it starts recording.
- To stop recording, go to the top-right corner of the screen, click on the video camera icon, and select “Finish Recording.”
-
MacOS
I prefer using QuickTime Player for this, as the recorded videos can be easily shared among Apple users without encountering codec problems, which sometimes occur with other software.
-
- Open QuickTime Player.
- Right click on the icon that appeared in the dock, select “New Screen Recording.”
- Select the area of the window you want to capture , and then click “Record.”
- Source the the movie.tcl file in the TK console of VMD when it starts recording.
- To stop the recording, go to the top right corner of the screen and click the white circle with a black square inside.
- The video will appear immediately; you can save it using the QuickTime Player menu (File/Save…) or trim it before saving (Edit/Trim).
-
Windows
There are many options on Windows, but the default option works well. This is accomplished using the shortcut “Windows key + alt + R” (Xbox Game Bar shortcut).
-
- Source the the movie.tcl file in the TK console of VMD.
- Press “Windows key + alt + R” to start recording.
- To stop recording, click on the blue circle with a white square inside.
- The recordings will appear in the folder “Videos/Captures”.
movie.tcl Script explanation
Go to the first frame with:
animate goto 0
Then go to the first visualisation point created with:
retrieve_vp 1
Create a smooth transition from viewpoint 1 to vp 2 (150 represents the number of frames).
move_vp 1 2 150
Iterate using a for loop from reactants to the transition state structure.
for {set i 0} {$i < 32} {incr i} {
animate goto $i
display update
}
Make another smooth transition, this time from vp 2 to vp 1.
move_vp 2 1 150
To make the green ligand appear, use:
mol on 1
Move smoothly from vp 1 to vp 3.
move_vp 1 3 150
Then from vp 3 to vp 2
move_vp 3 2 150
To make the green ligand disappear, use:
mol off 1
Iterate again using a for loop from the TS structure to the products.
for {set i 31} {$i < 64} {incr i} {
animate goto $i
display update
}
and finally return to the initial point of view using:
move_vp 2 1
If you are interested in the topic of this video, I encourage you to read our research study. The aim of this study was not only to clarify the reaction mechanism between the inhibitor 11a identified as a potent inhibitor, but also to highlight how the transition state involved in this reaction resembles the crystallographic structure of one of the inhibitors developed by Pfizer (PF-00835231). It is currently undergoing human trials, and we hope it will soon become a drug that helps stop COVID-19.
I hope this tutorial has been helpful. I would appreciate any comments you have to improve this tutorial.
Recent Comments